
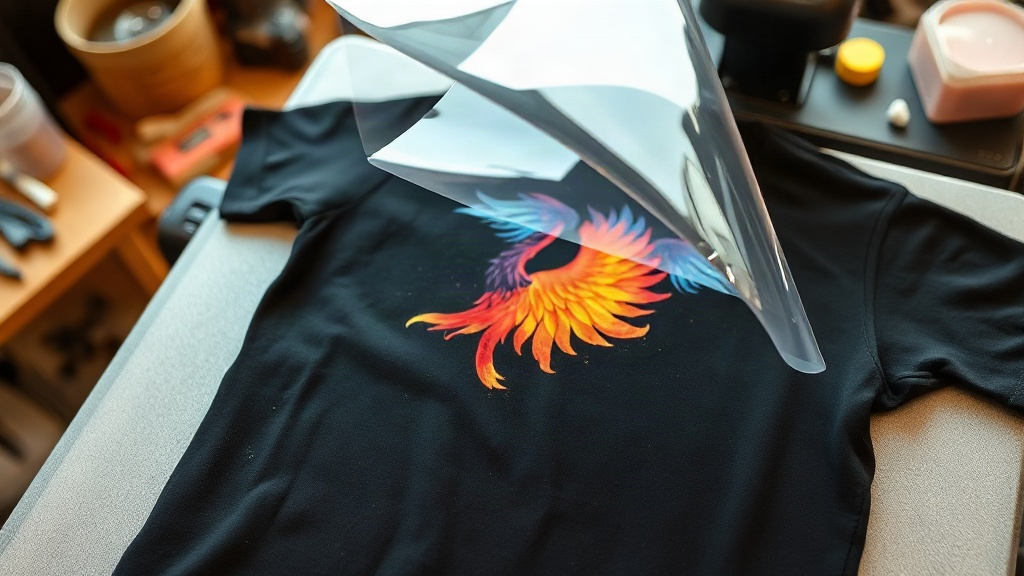
If you have spent any time in custom apparel circles lately, you have probably heard the acronym DTF tossed around like everyone already knows what it means. Maybe you saw a creator peeling a vivid, full-color design off a clear film and pressing it onto a cotton tee in under a minute. It looked almost too easy. The truth is that DTF printing is genuinely approachable, but it comes with its own set of rules, quirks, and failure points. This guide walks you through what DTF transfers actually are, how the process works from file to finished garment, and the practical details that separate a clean, stretchy print from a cracked, faded mess.
What Exactly Is a DTF Transfer?
DTF stands for direct to film. Instead of printing directly onto a shirt or cutting vinyl, a printer lays your design onto a special PET film using water-based pigment inks. While the ink is still wet, a fine thermoplastic powder is sprinkled over it. The powder sticks only to the wet ink. The film then goes through a curing step, usually with a heat press or a dedicated powder shaker and oven, which melts the powder into a flexible adhesive layer.
The result is a transfer you can store, ship, or press onto a garment whenever you are ready. When heat and pressure are applied, the adhesive bonds the ink layer to the fabric, and after the film cools, you peel it away. What remains is a soft, detailed print that sits on top of the fabric rather than soaking into it.
That last point matters. Because the design sits as a film on the surface, DTF can hold fine gradients, tiny text, and photographic detail that screen printing struggles with on short runs. It also works on a wide range of materials, which is where it starts to pull ahead of older transfer methods.
Why DTF Has Become So Popular
There are a few practical reasons this method has moved from niche to mainstream in small print shops and home studios.
- No weeding. Unlike heat transfer vinyl, you do not have to cut around every letter and pick out the negative space. The printer handles the whole design.
- Full color in one pass. White ink is printed as a base layer, so bright designs show up on black and dark navy shirts without a separate white underlay step.
- Fabric flexibility. Cotton, polyester, blends, canvas, and even some leathers accept DTF transfers well.
- Storage. Cured transfers keep for months if stored away from moisture and direct sunlight, so you can print a batch and press as orders come in.
For anyone doing one-off shirts, small team orders, or print-on-demand style work, that combination is hard to beat.
How the DTF Process Works Step by Step
1. Preparing the artwork
Your design needs to be mirrored before printing. Most RIP software handles this automatically, but it is worth double-checking. Transparent backgrounds are ideal, and a clean white base layer should be generated behind any colored areas. If your file has stray pixels or soft edges, they will show up in the final print, so clean up the artwork first.
2. Printing onto film
The printer lays down white ink first, then cyan, magenta, yellow, and black on top. The film must be the correct side up, and the printer needs regular maintenance. Clogged nozzles are the number one cause of banding and missing color, and no amount of pressing will fix a bad print.
3. Applying powder
While the ink is wet, powder is applied evenly across the design. Too little powder and the transfer will not adhere properly. Too much and you get a rough, stiff feel with powder residue around the edges. A shaker unit gives the most consistent result, but manual application works with practice.
4. Curing
The powdered film goes into a curing oven or under a heat press for a short, controlled period. The goal is to melt the powder into a smooth, slightly glossy adhesive layer without scorching the film. Temperature and time vary by powder type, so follow your supplier's spec sheet rather than guessing.
5. Pressing onto the garment
This is where most beginners run into trouble. Typical settings fall in the range of 300 to 330 degrees Fahrenheit for 10 to 15 seconds with medium to firm pressure. Peel time matters too. Some transfers are hot peel, others cold peel. Peeling at the wrong temperature can pull ink off the garment or leave a cloudy residue.
Common Mistakes and How to Avoid Them
After pressing a few hundred transfers, patterns emerge. Here are the issues that come up most often.
- Washing too soon. Give the print at least 24 hours before the first wash. The adhesive continues to settle.
- Wrong pressure. Light pressure leaves the edges lifting. Too much pressure flattens the print and can cause the design to bleed.
- Skipping a test press. Every garment and every batch of transfers behaves a little differently. A scrap shirt is cheaper than a ruined order.
- Ignoring moisture. Damp fabric traps steam under the transfer and causes poor adhesion. Pre-press the garment for a few seconds to drive out moisture.
- Storing transfers badly. Humidity and heat degrade the adhesive. Keep them in a sealed bag in a cool, dark place.
DTF vs Other Decoration Methods
Screen printing still wins on very large runs where cost per piece matters most. Vinyl is cheaper for simple one-color text and numbers. Sublimation only works well on polyester and light colors. DTF sits in a sweet spot: full-color, detailed designs, small to medium quantities, and a wide range of fabrics. It is not the cheapest option for every job, but it is often the most flexible.
One detail worth knowing: DTF prints have a slight hand feel. They are not as soft as a well-executed water-based screen print, but modern powders and thinner ink layers have closed that gap considerably. On stretchy fabrics, the print moves with the garment rather than cracking, provided the transfer was pressed correctly.
Getting Started Without Wasting Money
You do not need a full production setup to try DTF. Many people start by ordering pre-printed transfers from a supplier, then pressing them at home with a decent heat press. That path lets you learn press settings, peel timing, and garment behavior before investing in a printer, powder, and curing equipment.
If you do buy a printer, budget for maintenance supplies, film, powder, and a curing solution. The printer is only one part of the system. Neglecting the rest is why some people get great results and others fight the same problems week after week.
Frequently Asked Questions
How long do DTF transfers last on a shirt?
With proper pressing and washing inside out in cold water, most DTF prints hold up for dozens of washes. Longevity depends more on press technique and wash habits than on the transfer itself.
Can I use DTF on 100 percent cotton?
Yes. Cotton is one of the easiest fabrics for DTF because the adhesive bonds well to natural fibers. Polyester and blends also work, but very stretchy or coated fabrics may need a test press first.
Do I need a special printer for DTF?
You need a printer designed for DTF inks with a white ink channel. Standard desktop inkjet printers cannot handle the white base layer or the pigment inks required for this process.
What temperature should I press DTF transfers at?
Most transfers press between 300 and 330 degrees Fahrenheit for 10 to 15 seconds. Always confirm with your supplier, because powder formulations and film types vary.
Why is my DTF print cracking after a few washes?
Cracking usually points to under-curing during the powder stage, too little pressure during the press, or washing in hot water. Check each step in order, starting with the cure.