
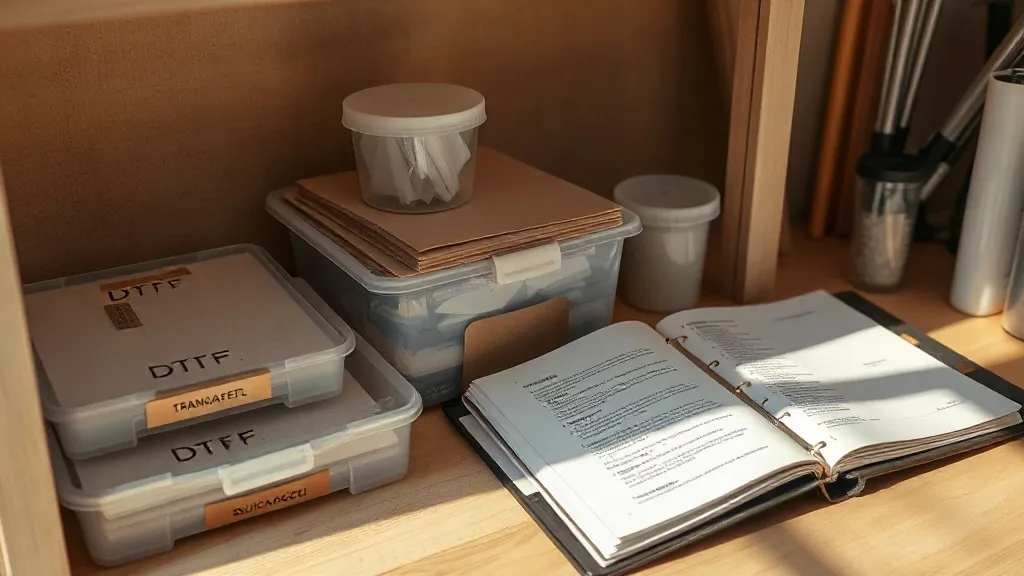
Most conversations about print quality start at the heat press. They shouldn't. Long before a transfer touches a platen, it has already spent days or weeks sitting in a drawer, stacked on a shelf, or taped to a wall, quietly absorbing whatever the room throws at it. If you have ever pulled a perfectly good sheet of dtf transfers out of storage and watched it cup, wrinkle, or shed powder onto your fingers, you already know that storage is not a housekeeping detail. It is part of the process.
This guide is about the unglamorous middle of the workflow: what happens between the printer and the press. Whether you run a two-person shop or a garage operation that ships a few dozen shirts a week, a simple storage system will save you more material than any press setting tweak.
Why stored transfers misbehave
DTF film is a layered product, and each layer reacts differently to its surroundings. The PET carrier sheet wants to stay flat. The cured ink layer is semi-flexible but brittle when cold. The adhesive powder on top is hygroscopic, which is a technical way of saying it pulls moisture out of the air. None of these layers are especially fragile on their own, but they disagree with each other when conditions change.
Three forces do most of the damage:
- Humidity. Powder that has absorbed moisture clumps, cures unevenly, and can leave a tacky or grainy surface after pressing. In a humid climate, an open bag of powder or an unsealed stack of printed film is a slow-motion failure.
- Pressure and weight. Film stacked under heavy objects or folded into a crowded drawer develops creases and curl. A crease in the carrier sheet becomes a visible line or a weak spot in the final print.
- Heat and light. A shelf above a dryer or next to a window is the worst place in the shop. UV exposure and temperature swings make film brittle and can affect how the ink layer releases.
None of this shows up as an obvious defect at first. You just notice that a batch of dtf sheets presses worse than the last one, and you blame the powder or the press settings when the real culprit was the shelf.
A storage setup that costs almost nothing
You do not need a climate-controlled room. You need a consistent routine and a few cheap containers. Here is a setup that works in small shops.
Keep film flat and horizontal
Store printed transfers in shallow, rigid trays or archival flat files, never folded or rolled for more than a day. A simple solution is a stack of corrugated or foam board cut slightly larger than your largest sheet size, with transfers sandwiched between them and held with a light clip. The board keeps the stack rigid and the transfer flat. If you must roll a large piece for shipping, roll it loosely around a cardboard tube with the printed side facing out and note it on the order so the customer knows to flatten it before pressing.
Control moisture, not just temperature
Room temperature is less important than stable humidity. A sealed plastic bin with a few silica gel packets does more for your transfers than a space heater. Keep the bin closed when not in use, and replace the desiccant every couple of months or when the indicator beads change color. For powder, decant only what you will use in a session into a small shaker or jar, and keep the main container sealed. This single habit prevents most clumping problems.
Label everything you print
An unlabeled transfer is a mystery, and mystery transfers get reprinted. Every sheet or bag should carry four pieces of information:
- The date it was printed.
- The ink and powder brand or batch, if you track it.
- The garment type and color it was intended for.
- The order number or customer name.
A strip of masking tape and a permanent marker handles all four in ten seconds. If you print in volume, a small label printer pays for itself within a month just in reprint savings.
Separate by job status
Sort transfers into three zones: ready to press, waiting on a garment, and reorders or stock. Physical separation prevents the classic mistake of pressing a transfer that belongs to a different customer's order. It also makes it obvious when a stack has been sitting too long.
How long can you actually store transfers?
There is no single answer, because shelf life depends on powder type, film quality, and conditions. What matters is that transfers are not indefinitely stable, and treating them as if they were leads to surprises. A practical approach is to press older stock first and to write the print date on every label so you always know what is oldest.
If you are unsure whether an older transfer is still good, run a test press on scrap fabric before committing it to a customer order. Check that the powder has not clumped, that the film is flat, and that the transfer releases cleanly when peeled cold. A single test garment costs far less than a reprint or a returned order.
When a customer asks about dtf transfers near me and expects fast turnaround, your ability to pull a correctly stored transfer off the shelf in seconds is a real competitive advantage. Shops that store well quote faster because they are not reprinting.
Filing systems for repeat orders
Repeat business is where organization pays off most. If a team orders the same logo on twenty shirts every season, you should not be re-preparing artwork and re-printing from scratch each time. Build a simple index:
- Store a small test swatch of each recurring design, pressed on the actual garment color, in a labeled sleeve.
- Keep a digital folder per customer with the final print-ready file, the press settings that worked, and the transfer size.
- Note the powder and film used, so if a design fails later you can trace it back.
This is the difference between a shop that scales and one that reinvents every order. The physical swatch matters because screens lie about color, and a pressed sample on the real fabric is the only reliable reference.
Travel and shipping considerations
If you ship transfers to customers, storage continues in transit. Use rigid mailers rather than envelopes, keep the printed side protected with a sheet of parchment or silicone paper, and include a short instruction card. A customer who presses a curled transfer with the wrong settings will blame your product, not their handling. A one-page card that explains flattening, pressing temperature, and peel timing prevents most of those complaints.
For local pickup, hand transfers over flat in a rigid folder rather than folded into a bag. It is a small touch that signals professionalism and reduces the chance of a crease forming on the drive home.
Quick reference: the storage checklist
Print this and tape it to the shelf:
- Film stored flat, never folded.
- Powder in a sealed container with desiccant.
- Printed transfers in a closed bin, away from heat and sunlight.
- Every sheet labeled with date, garment, and order.
- Oldest stock pressed first.
- Test press before using aged transfers on a customer order.
Frequently asked questions
Can I store DTF transfers in a garage or shed?
Only if the space stays dry and does not swing wildly in temperature. Garages are usually fine for short periods in mild weather, but humidity and summer heat make them risky for anything longer than a week or two. If a garage is your only option, use a sealed bin with fresh desiccant and check the contents before every order.
What happens if my transfer powder gets damp?
Damp powder clumps and cures unevenly, which shows up as a grainy surface, weak adhesion, or a tacky feel after pressing. Do not try to salvage a large clumped batch by drying it in an oven, because uneven drying creates its own problems. Discard the affected powder and reseal the rest with fresh desiccant.
Should I peel transfers cold or hot, and does storage affect that?
Peel behavior is mostly determined by the powder and film you use, so follow the manufacturer's instructions for your specific product. Storage does play a role: film that has absorbed moisture or gone brittle can release unevenly, leaving bits of ink behind. If a transfer that normally peels cleanly starts tearing, check storage conditions before changing your press settings.
How do I keep track of transfers for a large multi-design order?
Bag each design separately, label it with the design name, size, quantity, and garment, then group the bags in order by press sequence. A simple numbering scheme, such as order number plus a design letter, keeps everything traceable and makes it obvious if a piece is missing before you start pressing.
Do stored transfers expire?
They degrade rather than expire on a fixed date. Powder, film quality, and storage conditions all influence how long a transfer stays usable, so there is no universal number. The reliable approach is to date every print, rotate oldest first, and test press anything that has been sitting unusually long.